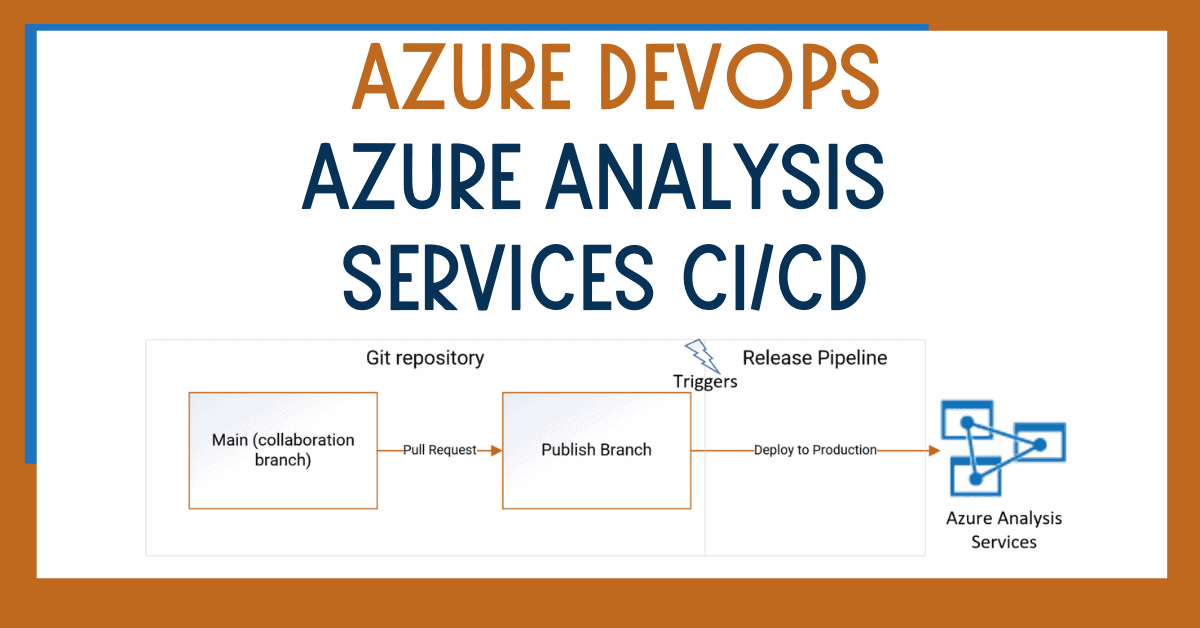
Are you trying to automatically deploy Azure Analysis Services changes across different environments? In this blog post, I’ll show you how to create an Azure DevOps Azure Analysis Services Continuous Integration and Continuous Deployment (CI/CD) solution. You can easily make changes using a custom Azure DevOps component without writing a single line of code.

Table of Contents
Install Azure DevOps Azure Analysis Services Component
First of all, for the Azure DevOps Azure Analysis Services CI/CD solution, we’ll use a DevOps component created by Jan Pieter Posthuma.
The main benefit of this component is that you don’t need to write any code! That’s right, you can get your solution up and running without writing code in just a few minutes. There are other great solutions available, but they usually require some code, adding additional scripts, etc.
The only key limitation is that it doesn’t support multiple Azure Analysis Services data sources. (I haven’t seen many scenarios like this one, however). I also haven’t tested with Yaml.
The component works perfectly and it is frequently maintained. You can get the component from this link and install it:
https://marketplace.visualstudio.com/items?itemName=liprec.vsts-release-aas

Simply follow the wizard to install it.

The component will become available in Azure DevOps.

Create Azure App to Manage Azure Analysis Services
Next, I recommend creating an Azure application that you can use to deploy the model in Azure Analysis Services and your Azure DevOps Azure Analysis Services CI/CD solution.
This step is still optional as you can use user and password (not recommended).
If you are using an Azure App, you will need to copy:
- App ID
- Directory ID
- Secret value

Next, define a name and click register.

Copy the App ID and the Directory ID.

Create a secret for your Azure application.

Define the start and end date for the secret.

Now, copy the value of the secret.

You can save the information in Azure Key Vault. Check out this blog post on Azure DevOps and Azure Key Vault if you want to use this option.

Grant Access to Your Azure App in Azure Analysis Services
In your Azure Analysis Services server, click properties to add the new Azure App to manage your Azure Analysis Services models. You will also deploy the models using your Azure DevOps Azure Analysis Services CI/CD solution.

Click Add.

Now, find the new Azure App name and click Add.

Finally, save the new App ID.

Create a New Git Repository Branch for Your Azure Analysis Services Project
In the Azure DevOps repository, where you have your Analysis Services solution, create a new branch that you can use to release the changes to the next environment.
You need to integrate Analysis Services and Azure DevOps.


Create Azure DevOps Azure Analysis Services CI/CD Solution
Let’s create an Azure DevOps Azure Analysis Services CI/CD solution. First, create a new release pipeline.

Select Empty Job.

Add an artifact.

Select the previously created Azure DevOps Azure Analysis Services branch.

Then, click to add a new job.

If you’ve stored credentials in Azure Key Vault, add the Azure Key Vault task to your job.

Configure the Azure Key Vault task as required.

The next step is to add the Azure Analysis Services Deployment task created by Jan Pieter Posthuma.
This task deploys the model with the changes to the Azure Analysis Services server.

Configure the task as required and save your pipeline. You can see that I am using Key Vault to reference the secrets that have my credentials.

In addition, you can configure your pipeline to start as soon as you check new changes into the branch.

You can also add pre-deployment approvals if you want somebody to approve the release.

You are ready to rock ’n roll!
Test Azure DevOps Azure Analysis Services CI/CD
If you want to test the solution, you need to create a pull request to merge changes between your main branch and the publish branch.
To begin, create a new pull request.

Then, select the source and destination branches.

Complete the pull request.


If you’ve enabled the continuous integration option, the release will trigger automatically. You can also trigger it manually.

In my case, I had to approve the deployment of the Azure Analysis Services model.

You might also get an email to approve it.

You can verify Azure DevOps logs to track the progress of the release pipeline.
Verify the steps of your Azure DevOps Azure Analysis Services CI/CD pipeline.

Now, let’s try to process the Azure Analysis Services model in the production environment.

It works!
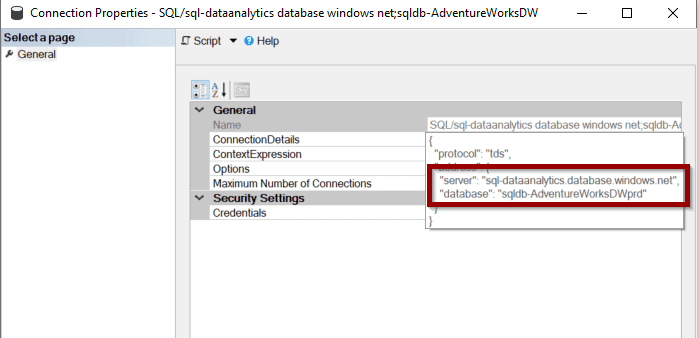
If you click properties, you should also see the values that you included as part of the Azure DevOps task.

Summary
In this blog post, you learned how to easily build an Azure DevOps Azure Analysis Services CI/CD solution without writing any code.
You can extend this solution to have more environments or even add the development environment if you want the solution to first deploy to it.
Now you will avoid manual intervention and taking risks while deploying between environments.
What’s Next?
In upcoming blog posts, we’ll continue to explore some of the features within Azure Services.
Please follow Tech Talk Corner on Twitter for blog updates, virtual presentations, and more!
As always, please leave any comments or questions below.