Do you know how to integrate Azure Analysis Services and Azure DevOps to easily enable code version control for your solution? Version control is the first thing that you need to enable in any solution if you want to follow industry best practices.
I’ve decided to write about integrating Azure Analysis Services and Azure DevOps in today’s post so I can show how to easily do Continuous Integration and Continuous Deployment for Analysis Services in upcoming posts.
However, today’s tutorial applies to any solution like database projects, SQL Server Analysis Services, database projects, Azure functions, or Microsoft Apps.
Is this process any different from SQL Server Analysis Services? No, you can follow the same tutorial. Don’t forget that Azure Analysis Services only supports Tabular Models.
Table of Contents
Create Analysis Services project in Visual Studio
To begin, in previous Visual Studio versions, you had to install SQL Server Data Tools. Starting with Visual Studio 2019, you need to install the extension.
First, click the manage extensions option.

Then, you need to install the Microsoft Analysis Services Projects extension.

After that, when creating a project, you can create new solutions or import existing models.

Example: Create a new project

Select if you want an integrated environment and the compatibility model.

Finally, once you click OK, the new solution will be added to the Solution Explorer. Now you can start building your tabular model.

Integrate Azure Analysis Services and Azure DevOps
To add your solution to code version control, click “Add Source Control.” This will add a local Git repository.

Additionally, you can also see some shortcuts in the bottom right hand corner.

If you view the files in file explorer, you can see the local git configuration.

By clicking “Add Source Control,” you can connect Azure DevOps, GitHub (you need an extension) or other external repositories.

Then, you can see the configuration for integrating Azure Analysis Services and Azure DevOps. Click “Advanced” so you see all the options.

You will see the following options:
- Account name (it needs to have access to your Azure DevOps tenant)
- Organization Name
- The project where you want to check-in the solution
- The repository name that you want to create for your solution
Click “Publish.”

You will get a summary message to go directly to your Azure DevOps repository.

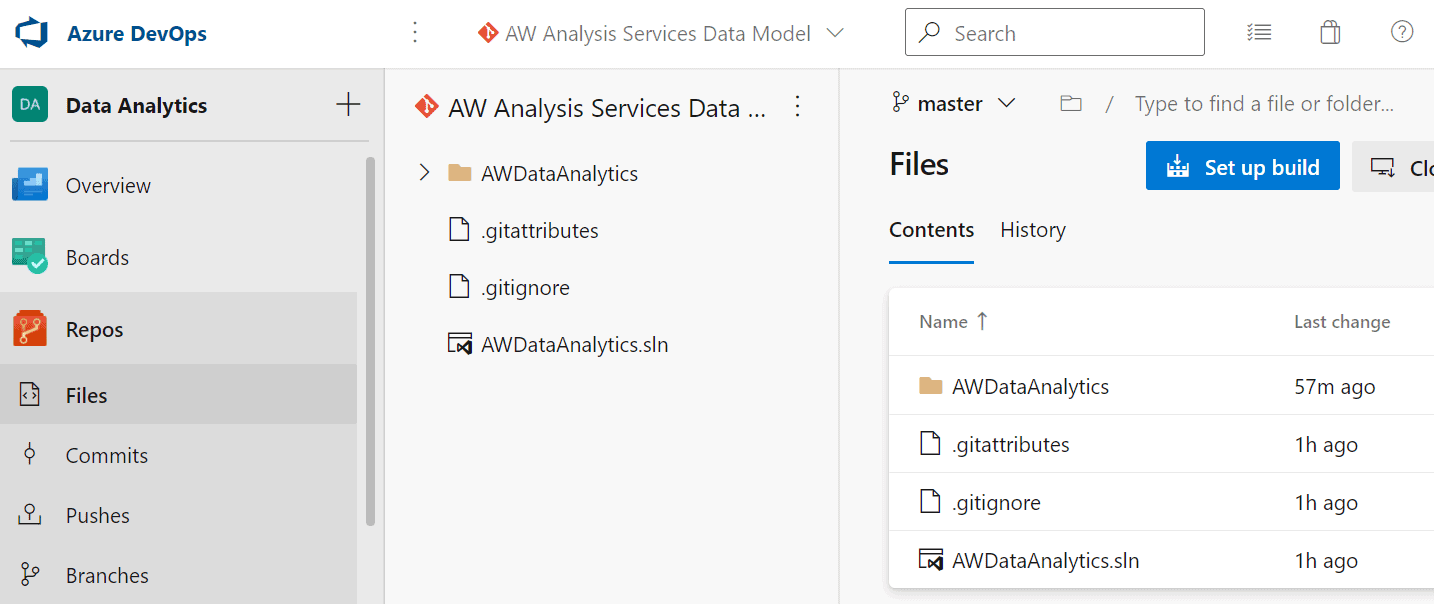
Finally, you can see the solution in Azure DevOps.

You did it! You’ve integrated Azure Analysis Services and Azure DevOps together. You have enabled version control and learned a fundamental skill going forward.
Checking in new Azure Analysis Services changes in Azure DevOps
Now, let’s check in some new changes. In the following example, I will add a new table to the solution.
When you click “Commit All,” this will add the changes to the local Git repository.

If you haven’t already, save your changes. There will be a summary of the changes in your local repository.

Next, it’s time to check in the Azure Analysis Services changes in Azure DevOps. In Team Explorer, go to Home and click “Sync.”

Look at the following sections:
- Some shortcuts for syncing, fetching, pulling, pushing and other actions. Sync allows you to perform Fetch, Pull and Push at the same time. I suggest having more control and following a 2-step process (Fetch and Pull, and then Push). You can also see the Branch. In my case, master is the collaboration branch. You could have different branches for different streams of development that will merge back to the collaboration branch.
- Fetch enables you to list any additional committed changes in the Azure DevOps repository. Pull brings the changes to your local repository.
- Push will push your local changes to the Azure DevOps repository. Important! You need to fetch and pull any changes in the Azure DevOps repository first before you can push your changes. This is because your local version may be out of date.

Once that you push your changes, you will see them in Azure DevOps.

Final Thoughts
Surprisingly, I continue to find solutions where version control is not enabled. This is an effortless activity and a must-do for any IT professional who performs development.
Summary
In this blog post, you learned how to use Azure Analysis Services and Azure DevOps together.
Azure DevOps offers some licenses that you can use for free, so you don’t have an excuse not to start using it. You can use any code version control provider, but Azure DevOps gives you release pipelines, Kanban boards, and an amazing ecosystem that integrates with Azure, not just version control.